Tutorials
The Oculus Go
- 1719 words
The Oculus Go was Oculus’ (now Meta) first attempt at a standalone virtual reality headset. Indeed, it was one of the first commercial attempts at a standalone VR headset entirely. By contemporary standards, it is extremely obsolete, though not completely useless. It can still run a range of software designed for it and is a reasonably open platform.
It was first announced in October 2017 and released in May the subsequent year. It released in two models – one with 32GB of storage and another with 64GB. Sales of the Go ended in 2020, with new releases and updates of Go software to the Oculus Store being barred after the 4th of December 2020. The device received its final update with build 18.05 in September 2021.
The specs are as follows:
- 60Hz 538PPI 2560x1440 WQHD, fast-switch LCD display (1280x1440 per eye).
- Horizontal RGB stripe subpixel layout.
- Software can overclock display, reaching 72Hz.
- 89° horizontal field-of-view (FOV).
- 90° vertical field-of-view.
- Fixed 63.5mm interpupilary distance (IPD).
- Stereo speakers.
- 2600 mAh battery.
- Quad-core Qualcomm Snapdragon 821 CPU.
- Kryo (2 x 2.15 GHz, 2 x 1.59 GHz).
- Adreno 530 GPU.
- 3GB RAM (LPDDR4).
- WiFi 5.
- Bluetooth 4.1.
The device has two ports: a Micro-USB port on the left side for charging and data transfer and a 3.5mm headphone port just below it for audio out. Centred atop the headset is a power button, and a status LED is present to its immediate left. The LED is red when at less than 15% battery, white when the screen is on, white and blinking when the device is restarting, and orange when the device is starting. While charging, the light is green when above 95% charged and orange when below. Further to the left of the unit’s top are volume control buttons. Two arms extend back from the sides, acting as mounting points for the headband and piping output from the speakers.
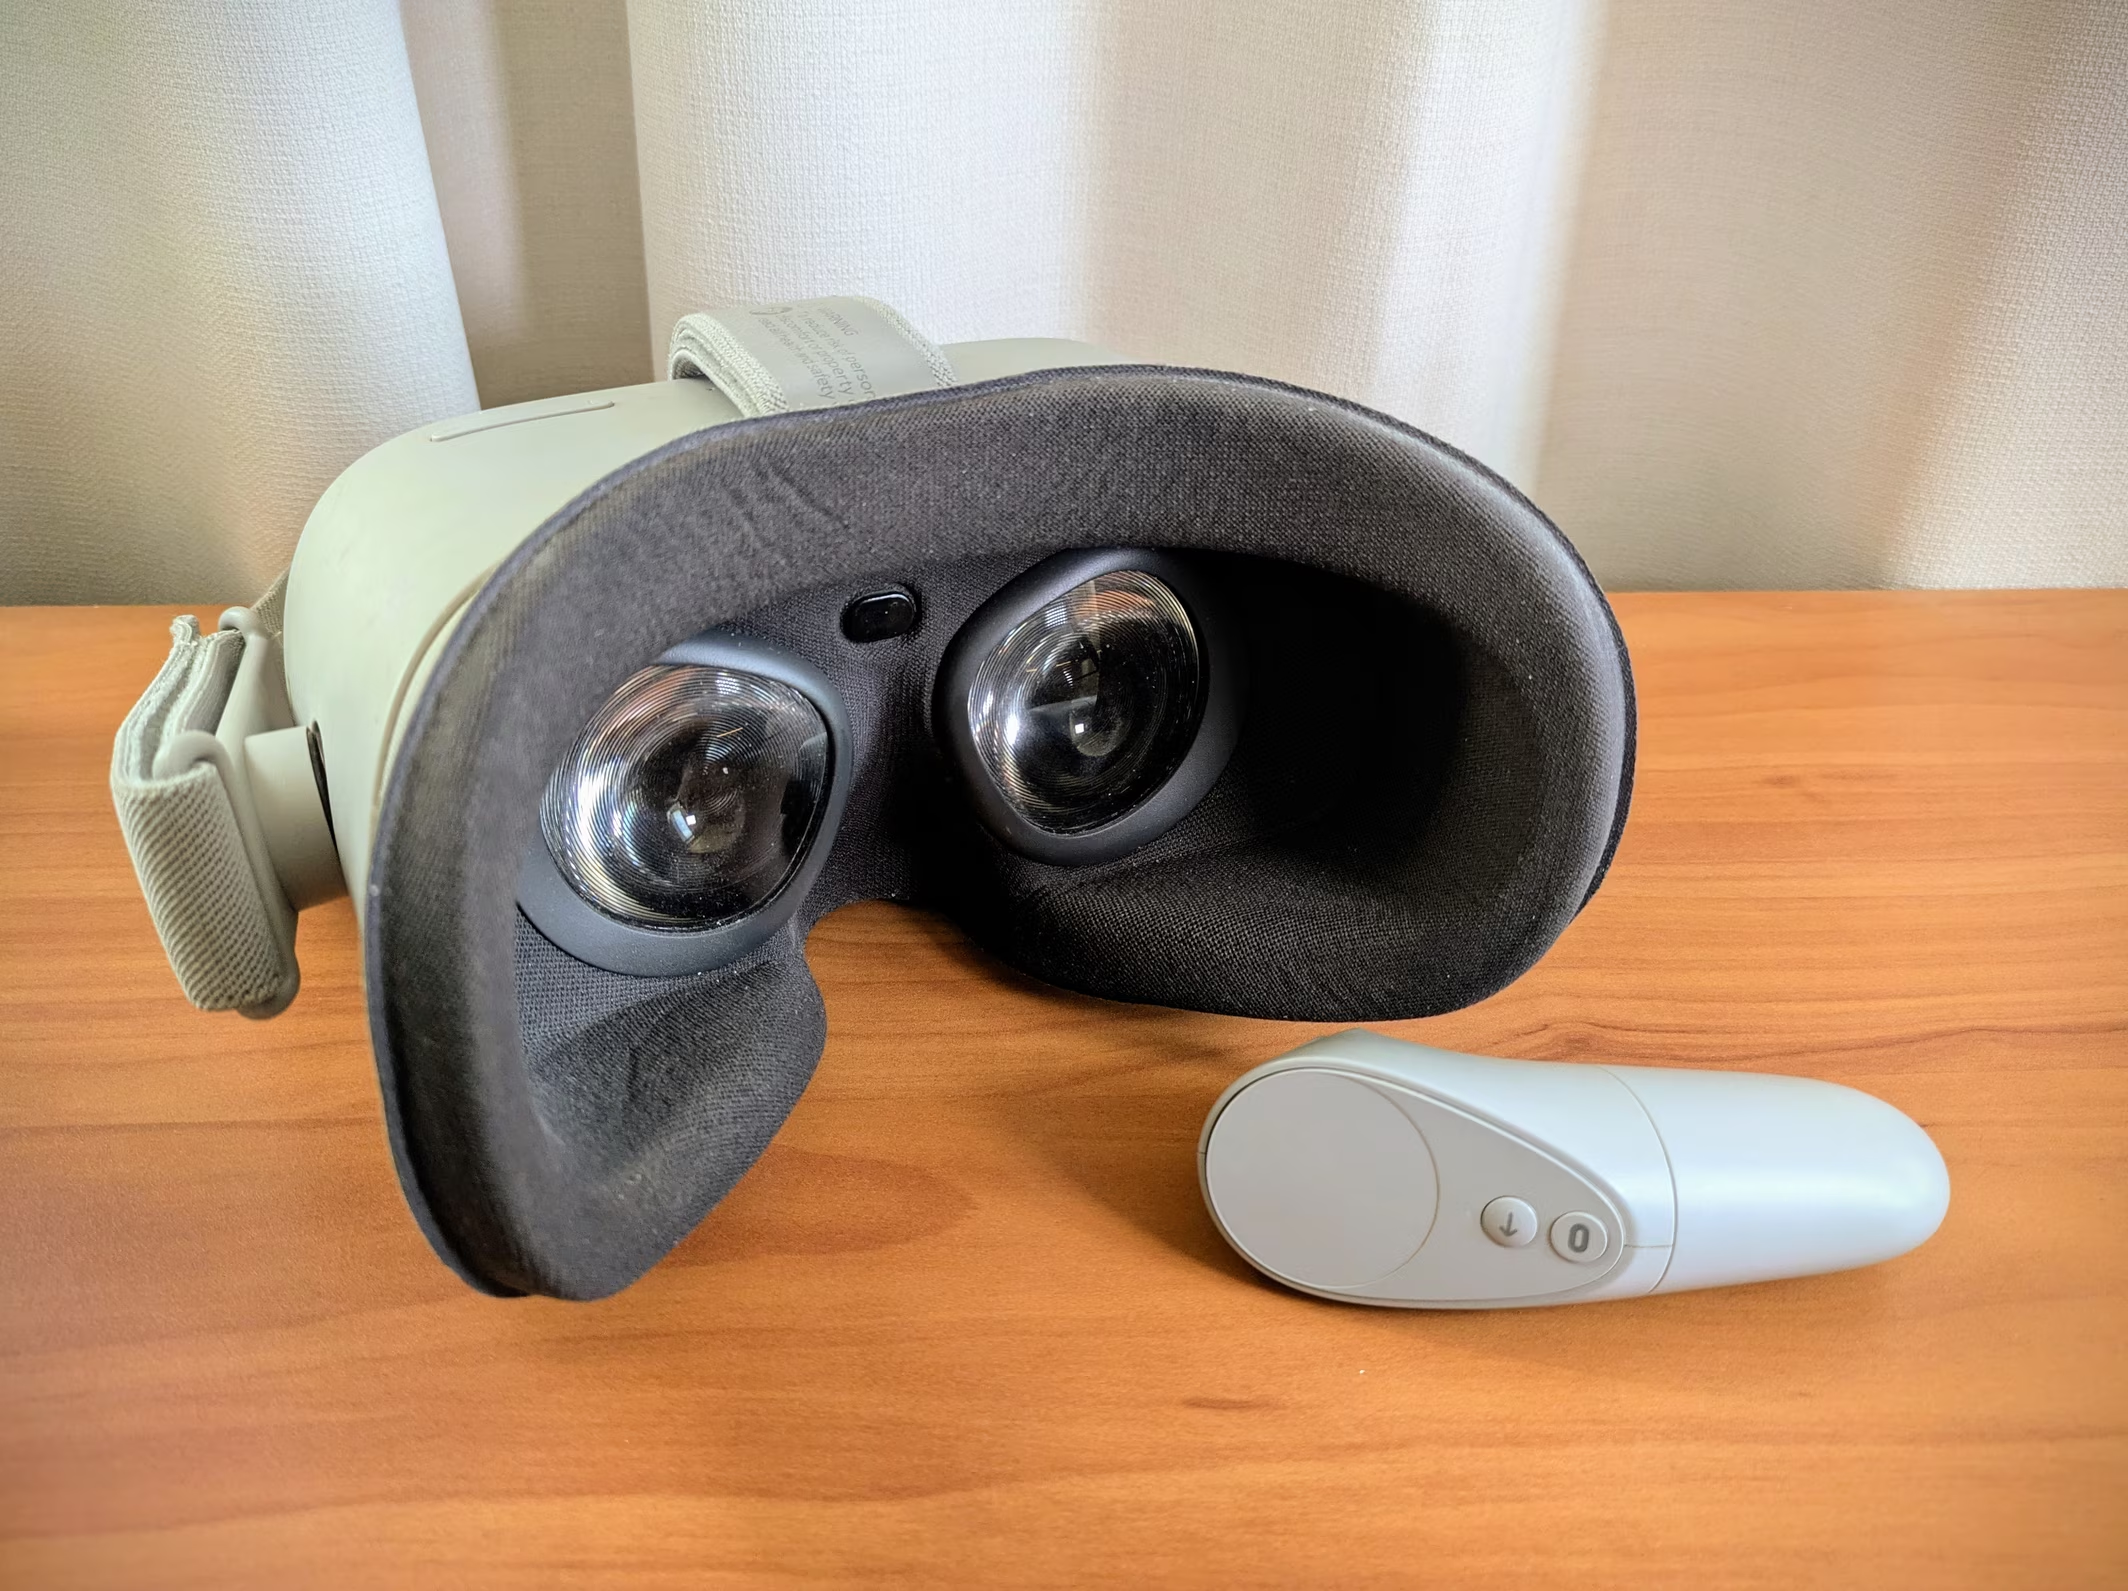
The Go has two Fresnel lenses, and between them is a small proximity sensor so the headset can detect when a head is present. There is no positional tracking, so the headset is limited to three degrees of freedom (3DoF) – it can only track pitch, yaw, and roll and has no concept of forward/back, up/down, or left/right. The headset’s single controller is small, with two buttons (one flat and one convex for tactile identification), a small, clickable, circular trackpad, a trigger, and a small under-plastic LED. It is powered by an AA battery which is installed by pulling the lower half of the controller’s external casing off and is symmetrical, making it ambidextrous. If operating the device without a controller, whatever is in the centre of the display can be selected by pressing the volume down button.
The device weighs 470 grams and has a decently comfortable head strap making it rather light and comfortable for long-term use, such as for watching media. Unfortunately, while good by 2018 standards, the display suffers badly from the screen door effect and doesn’t reach full blacks due to being LCD, not OLED.
Installing the Spacer
The facial interface is removable, and an included spacer can be placed behind it so that glasses can be worn with the headset. Unfortunately, the instructional video Inserting the Glasses Spacer is unlisted, and, as such, is difficult to find.
The process is as follows:
- Set the flat side of the headset down on a surface.
- Bend the two arms onto which the head strap connects up.
- Pull off the rings around the lenses.
- Pull the soft facial interface from the headset.
- Place the spacer flush where the facial interface sat.
- Replace the facial interface atop the spacer, ensuring it is flush and sits under the ridge of the proximity sensor.
- Reinstall the rings around the lenses.
- Bend the arms back into place.
It is worth keeping in mind that great care should still be taken even with the spacer, as there is a risk of glasses irreparably scratching the lenses.
Initial Setup
Since release people have been critical of the setup requirements. The Oculus Go requires the smartphone app for initial setup. You must go through the asinine phone process to install the unlocked software, and you must also have an Oculus Go controller. This is non-negotiable. The Oculus Go cannot be setup without a phone running the Meta Horizon app (previously the Meta Quest app, previously the Oculus app).
Supporting the Oculus Go is not a priority for Meta, and the app frequently introduces incompatibilities or failures. If you have the app but it fails to recognise your headset or you get stuck on a specific stage of setup (most infamously the ‘Health and safety’ step), it may be necessary to use an older version of the app. Version 244.0.0.4.117 of the Meta Horizon app for Android is frequently cited as working.
Unlocking
With an unlocked headset, you can do whatever you like. You can modify the experience and install whatever software you want, such as games, apps, or enhancements like the Ocular Migraine Master Control Program. It is similar to having a rooted Android phone. SideQuest hosts a number of applications for the Go.
There are a few guides out there for unlocking. In addition to the one I’ve written below, these may also be of use:
- Unlocking Oculus Go - The official guide. Unfortunately, it gets some details wrong. For example, they incorrectly state that you must hold volume up, rather than volume down.
- Tutorial: Unlocking The Oculus Go
- How to sideload apps on Oculus Go & Quest
You will need to install the Android Debug Bridge (adb) and fastboot on a computer. These are command-line applications that allow direct interfacing with Android. They can be downloaded from the Android SDK Platform Tools. You will likely also need to install the Oculus Go ADB Drivers.
You will also need to download the Oculus Go SW Unlock. It should download as Oculus_Go_SW_Unlock_v1.zip and be 711MB in size. You will need to unzip this folder.
The unlocking process is as follows:
Completely power off the headset (can be achieved by holding the power button).
Connect the Oculus Go to your computer with Android SDK Platform Tools.
Turn the headset on by holding volume down and the power button. You should be presented with a menu:
USB Update Mode
Use volume buttons to move selection.
Power button to select.Exit and boot the device
Factory reset
Enable sideloading update
Power offSelect ‘Enable sideloading update’. The headset’s LED should begin blinking purple.
Run
adb sideload unlocked_build.zip, ensuring thatunlocked_build.zippoints to the archive extracted fromOculus_Go_SW_Unlock_v1.zip. Make sure you run this command while the LED is blinking purple. After running the command, the device will take a few moments and then reboot.Reboot to the bootloader with the command
adb reboot bootloader, or by holding the volume down button while the headset boots and selecting ‘Exit and boot the device’. If those methods fail, you can use the commandfastboot oem unlock, though it should be noted that this method factory resets the device and wipes all data.
The device is now completely unlocked, allowing you to root it or do whatever you wish. The device will now show a warning screen while booting, which indicates that the software does not have an Oculus signature and thus that our unlocking has been successful.
Your device software can’t be checked for corruption. Please lock the bootloader.
Visit this link on another device:
https://support.oculus.com/
Your device will boot in 5 seconds. Press power key to skip.
Troubleshooting
If, once unlocked, you find yourself stuck in the setup or needing to bypass it, you can do so with this command: adb shell am startservice -a firsttimenux.ota.SKIP_NUX -n com.oculus.companion.server/com.oculus.firsttimenux.ota.OtaIntentService
If step 3 didn’t work for you, you’ll need to use a more complex method to access the sideloading mode. You can try the command adb reboot sideload. If that doesn’t work, you can try adb reboot bootloader, from where you should be able to select the ‘Enable sideloading update’ option as previously described.
If step 4 returns failed to read command: No error or progress freezes, try plugging in the Go via a USB 2.0 port. Sometimes faster ports cause issues.
If the Go fails to install the unlocked software as part of step 4, you will need to redo the process but first explicitly enable developer mode. You should be able to do this by toggling Developer Mode in the Go’s settings within the settings on your phone. If you aren’t given the option, you can try an older version of the app. If it still isn’t present, it is likely because you need a registered, verified developer account.
If you find yourself stuck on a screen with three dots in a grey capsule akin to a typing indicator in a messaging app, you must pair your headset with the app.